Travel Tip: Get the Tent Out!

Travel tips from http://www.travellingzombie.com

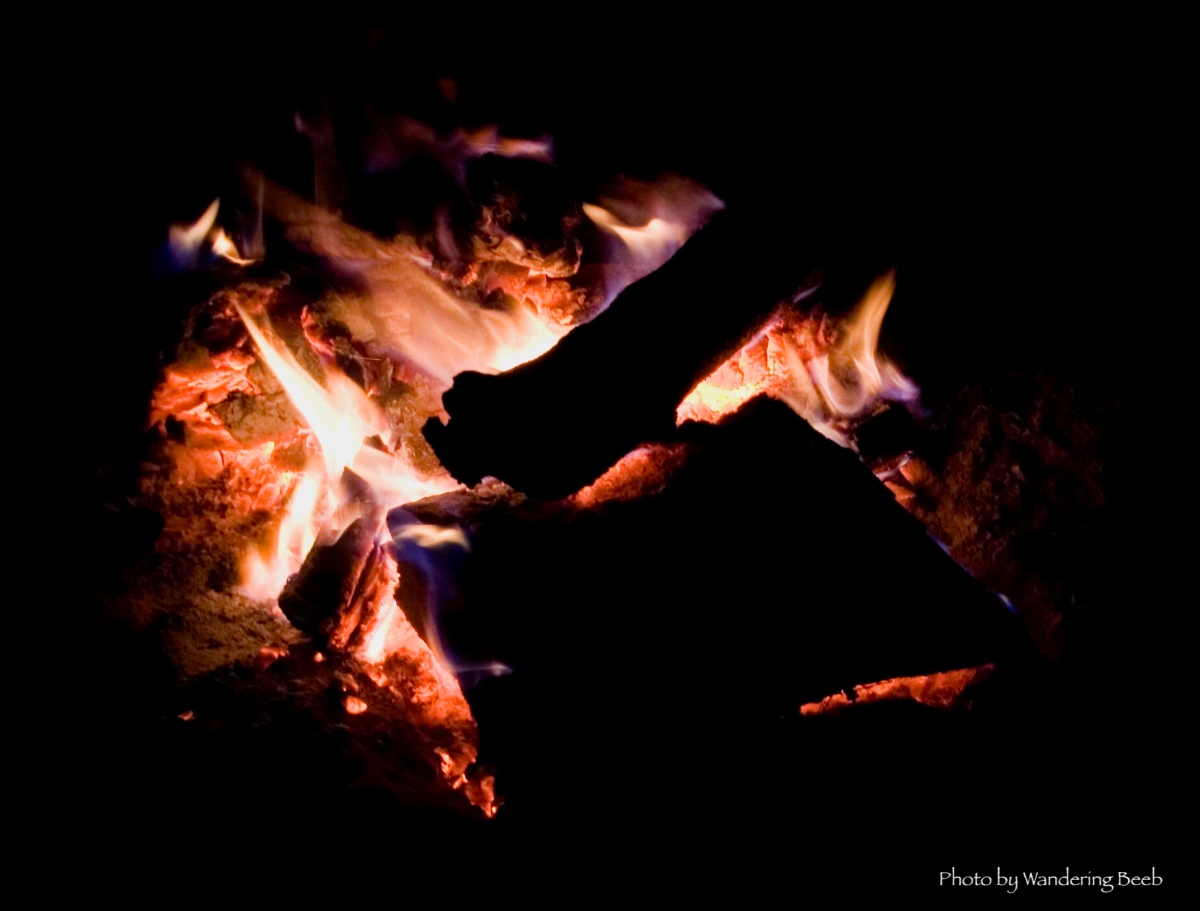
When we first started to travel, I was not a camping fan. I dislike bugs, being cold and mud – so it was no surprise that I’d rather stay in a comfy, warm hotel. However, on our first trip to a National Park in the USA, I was persuaded to give it a go. I’m so glad that I did! It was the best part of our trip, with nights around the campfire firmly cemented in my memory.

One of the main reasons I was happy to give it a go was for the cost. Accommodation is one of the most expensive elements of travelling. Camping can help with that. With pitch costs of around $26 per night in Wawona, Yosemite, camping can cut your accommodation costs in half.

enlight182-1

When we first travelled to Yosemite and Tahoe, we had no clue about what tent to get and we didn’t want to have to pay extra to fly the tent over to our destination. This meant that we visited Kmart on our first day in the USA and, after much deliberation, we ended up buying a tent that was probably more suited to a backyard sleep over than a week or so in a couple of National Parks. Our main selection criteria was that it was big enough for three of us and had a sewn-in ground sheet (I refused to camp of there was a chance that spiders could crawl into my bed – ugh). We also ended up with sleeping bags that were fairly thin, and in one person’s case – didn’t come up past their chest! To be fair, the tent and the sleeping bags did their job – they were cheep and cheerful (we were not going to pay to fly them back to England and so they would be given away at the end of our trip) and they kept us clean and dry, however, they weren’t really designed for the cold nights of Yosemite.

Learning from our first experience, the next time we camped, we purchased a huge four-man tent in the UK and counted this as one of our bags, splitting the rest of our gear between the baggage allowance for the remaining three people in our party. This actually worked out far cheaper and meant that we had a sturdy, well-made tent for our adventures. Although there was lots of room in this tent (we could fit in four large airbeds!), it took four people, a good thirty minutes and the tips of one of my fingers to put up.

The big tent is great, particularly for camping trips on the UK but it only works out cheaper to take abroad if there are a few of you with whom you can split the luggage. So what do we do if it’s just me and Wandering Beeb? We did a huge amount of research and purchased a much smaller tent. We ended up with a MSR Elixir 3 tent.

enlight181-1

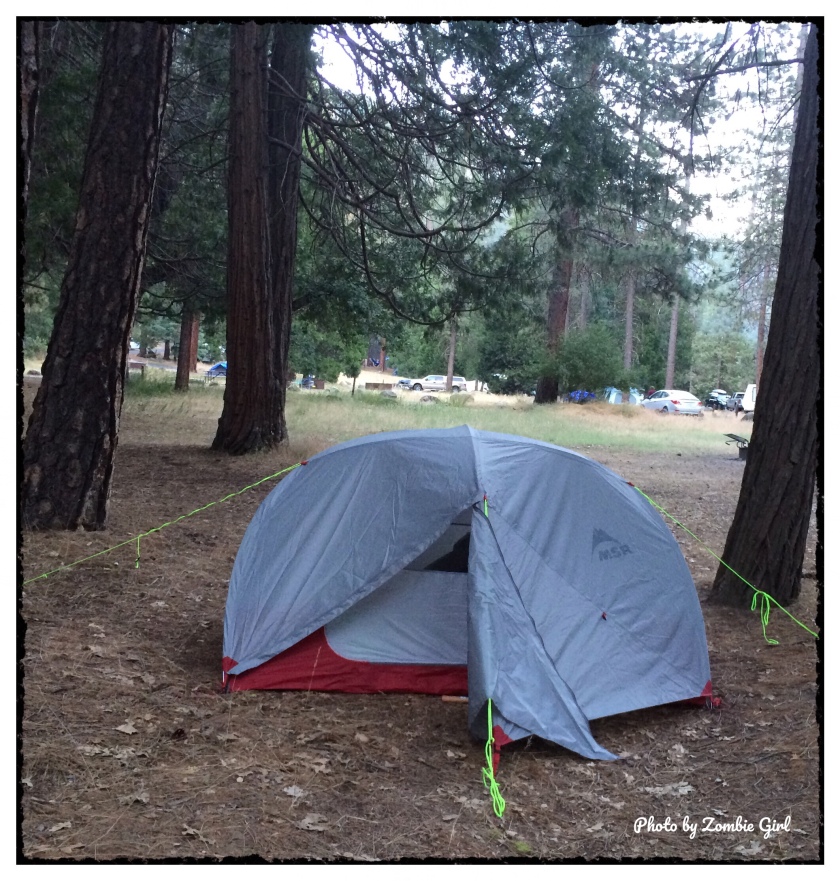
This little tent is a beauty! Firstly, it looks the business – it’s fairly low to the ground and has a curved design, giving you lots of head room whilst feeling really airy. The ground sheet is sewn-in and the two doors are well-sealed to prevent any unwanted visitors or rain getting in. Although there is a two-man version of the tent, we were sensible to go for the three-man option to get a little extra room as it’s a very snug inside. It’s small, geometric design made it really sturdy and it was unbelievably easy to put up. Usually there is a lot of swearing and sore fingers when we camp – not in this case as it’s easy enough for one person to put it up in about 10 minutes – winner!! Even better, as it’s so lightweight and can be split up into two small bags, we were able to fit it in with our usual luggage allowance, meaning that we didn’t incur any extra charges.

enlight183

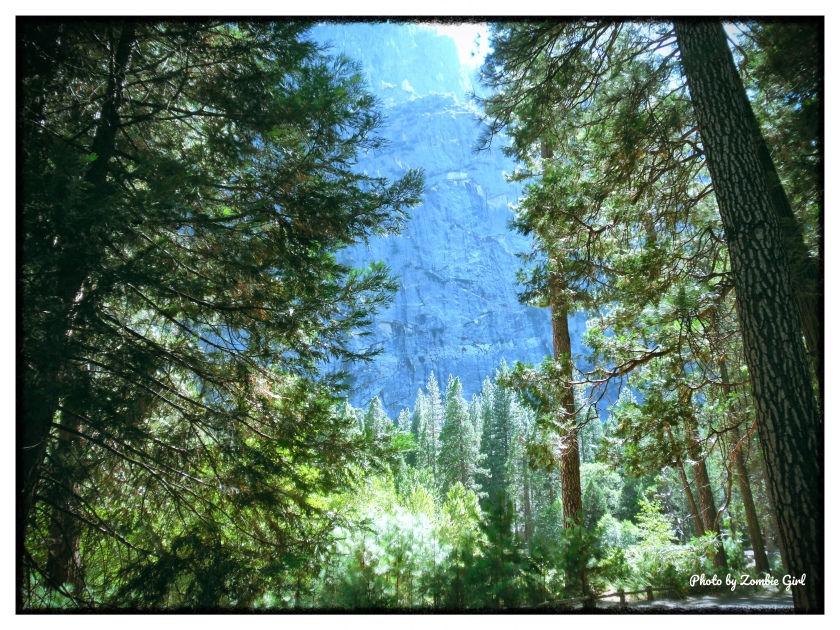
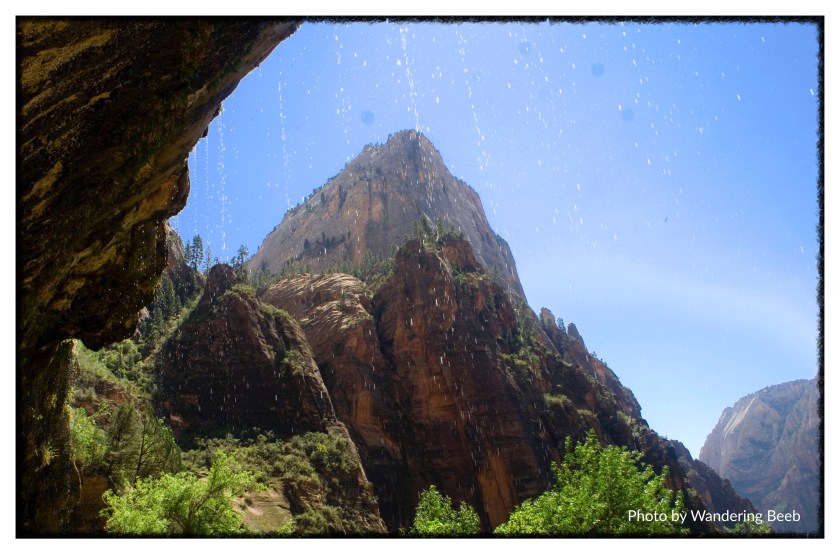
One of the best things about this tent had to be the option to remove the outer layer and look up through the mesh panels at the stars. The Yosemite night sky is one of the most beautiful sights we have ever seen and to be able to look up at the stars from the comfort of our sleeping bags was incredible – something you would absolutely miss out on in a hotel.

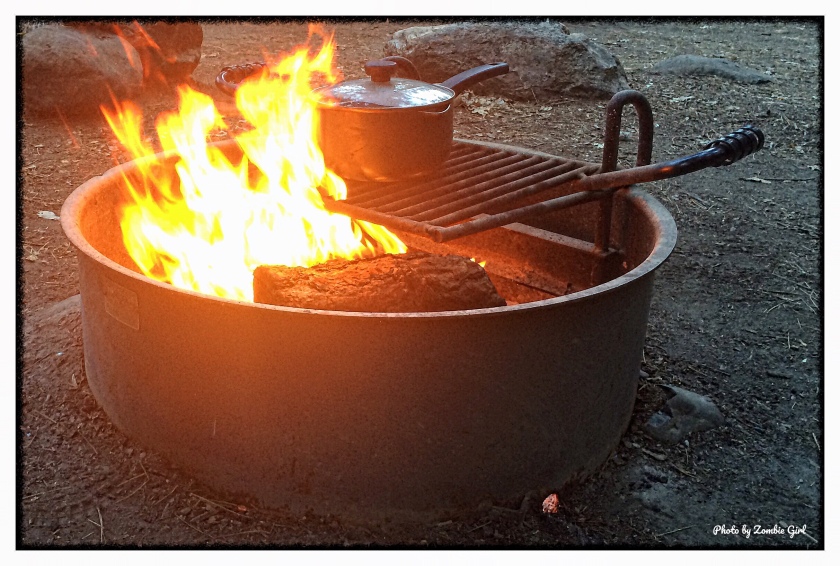
As well as incredible sights, camping brings you together as travellers like nothing else. There is something about a good campfire and nights huddled round a torch that bond you in a way nothing else can.

What tent do you use? Any good recommendations? Tell us in the comments! 

We Found Water in a Deserted Place

The drive into Zion had been beauty of a different kind compared to our other stops. Twisting roads and reddish rock encased us as we wound our way into the canyon.

Our first stop in Zion was to the Watchman Campground to set up our gear. That was easier said than done. You’d think that as seasoned campers, we would know how it’s done and have everything we need. Nope! What we hadn’t realised was that the campsites in Zion are on a rocky surface, not flat forest ground. This is probably to try and deter critters and ants from seeing the tent as a new home, however it also meant that we had no place to secure our tent pegs. This was our first obstacle, but certainly not our last. Having secured the tent as best we could (think bags and rocks weighing down the corners), two of us set off for the local shop for supplies whilst two stayed behind to work on the tent.

Arriving at the shop, we found it mostly empty. The shopkeeper (almost certainly an extra from some B movie horror) told us ominously that a storm was coming and that we should make sure that we were safely under shelter when it hit. We were a little naive at this point – the skies were still blue and not a drop of rain in sight! We meandered around the shop, picking up supplies and slowly but surely the day started to darken. By the time we left the shop, we were sprinting to the car, soaked through as the rain ran in rivers down the road, filling the storm gulley to the brim.

Meanwhile, back in the tent, the rain was battering the sides, making our temporary home even more precariously weighted down than it was to start with! These floods and high winds hit sporadically throughout the time we were there, often in the middle of the night, leaving us holding on to the tent poles to make sure that we didn’t blow away! They often lasted little more than an hour or so and were in massive contrast to the scorching sunshine we experienced throughout the day. It was actually that hot that our air beds curved with the heat!

One of our day hikes took us out to the Emerald Pools and waterfalls. You’d think that somewhere like Zion, full of rock and dust, wouldn’t be the best place for waterfalls but you’d be wrong! Upper, Middle and Lower Emerald Pools are all accessible from near the Grotto Picnic area. It was a boiling hot day and although the hike was very warm, it was well worth it for the sights – although the water wasn’t very Emerald in colour on our visit, instead it was coloured a reddish brown from the rock.

The most exciting part of the hike for me was the trail around Lower Pools which actually lets you walk underneath the waterfall. We went in late summer and so the flow wasn’t too strong, more of a light mist pouring over the ledge above us, dusting us with cool water that was refreshing against the relentless hot sun. I’d imagine that in winter this would be a very different experience! We spent quite a bit of time here, taking in the sights and snapping photos under the waterfall in an awe-filled silence. The various colours of the rock provided an stunning backdrop and there was something otherworldly about being behind the fall of the waterfall.

The pathway past the lower falls curved back on itself, winding upwards towards the Middle Pools which provided a good view of the path of the water as it fell down to the ledge below. The source of the water, Upper Falls, opened out to a huge pool, surrounded by some shady spots – a beautiful place to stop for lunch! The views looking out over the valley are amazing, made all the more picturesque by the mix of colours in the red rock, deep water pools and patches of green trees.

This was a fairly easy hike. It’s always useful to have good sturdy shoes for hiking rocky pathways (particularly with good ankle support) to avoid twists and sprains. We also saw a couple of snakes and lizards on the pathways and so the extra height on my shoes made me feel a bit more able to avoid them as I walked!

Another one of our hikes took us out to the Narrows. This is the narrowest part of Zion Canyon and offers a few different options for hikers. The start of the Narrows is accessible from a fairly smooth hiking path – the Riverside Walk. This takes you as far as the river, which more adventurous hikers might want to follow to travel further into the Narrows, although permits are needed for progressing past certain parts of the route. If you want to walk further than the paved section of the hike, you need to wade through the flow of the river – so good sturdy shoes, hiking poles and some dry socks for the way down are a must. It’s also really important to be good at navigating and reading weather conditions to make sure you are safe in the Narrows – many people have found themselves in difficulties in this area after experiencing flash floods, strong currents or getting lost.

When we arrived at this point, the water was up to our shins and fairly fast moving. Given that there was a very high risk of flash floods that day (and we’d already seen first hand how quickly a huge amount of rain could come down) and that we weren’t really prepped for hiking in water, we decided to not go much further than this, content with seeing the start of the winding caverns of the Narrows.

Temple of Karnak

Boiling hot, breath-taking and ancient. There was no other way to describe it! I visited Egypt a couple of years back in the middle of summer and the heat was glorious! I say glorious – it felt that way by the pool. It didn’t feel quite so wonderful whilst I was wandering around ruins of the great Luxor temple in the mid-day sun!

Nevertheless, I slathered myself in sunscreen, donned a huge floppy hat (which I thought made me look like Audrey Hepburn but probably made me look more like Blossom), gathered as much water as I could carry and prepared to sweat non-stop for the day.

Karnak temple (or Luxor Temple as its otherwise known) is a mixture of huge pillars, statues and carvings across a mixture of temples and chapels. The hulking stone statues at the entrance to the temple loomed over visitors to the complex, reminding me of the two statues in the Never Ending Story, just waiting to snap open their eyes and shoot out lasers as I passed through.

Between the pillars, people walked, necks craned upwards at the sheer size of the structures. I felt like an ant, scurrying from one side of the open air museum to another.

One of the most incredible aspects of Karnak (for me anyway) is the lines of statues leading away from the main entrance towards a temple further across Luxor. In some places they were fully excavated, in others almost completely buried, the marked the procession route from a far away time. To imagine what this must have looked like blows my mind!

Requests for ‘Backsheesh’ (otherwise known as ‘tips’) were fairly common on my trip. Luxor was no exception. A couple of regularly used approaches included offering to take your photo- for a small fee (never give someone else your phone / camera as you won’t get it back until you pay money) and offering to ‘take you to a great photo location’ which is often far from it, but still requires payment! One of the best ways of dealing with any offers of unwanted tips or suggestions is through the use of ‘La Shukran’. This means ‘no thank you’ in Arabic. Using this phrase gives a firm but polite response and I found it to work well.

I had a private guide for the day who gave me a personal overview of the history of the complex and directed me to the most interesting parts of the site. Although this was slightly more expensive than doing it on my own, in my opinion, it was money really well spent. I had organised the guide from home before I set off for Egypt, getting a good deal which also included transport for the day. The guide was lovely and really knowledgeable, and having him around meant that I had far fewer people offering to sell me something or take me to something interesting to photograph!

Not content with a visit to Karnak during the day, I also revisited the site during the evening for a light and sound show. Although it was sometimes difficult to make out what was being said and the ‘light show’ was more a case of simply adding lighting to the statues, it was still well worth the money just to have the chance to wander round the site in the dark.

Karnak after dark is a whole different ball game. If the daytime showcases a place of worship and somewhere to place offerings to the gods, nighttime Karnak is where the gods come to share their secrets and devise their schemes. A warren of twists and turns, with the imposing columns holding sway over the activities at ground level. The carvings seemed to flicker in the low light and the shadows created a mysterious atmosphere – so much so that people spoke in hushed whispers despite the booming PA system. Heading home to the hotel, my head was full of a deeper appreciation for Karnak and it’s history.

My experiences in Karnak were a number of years ago. Have you been recently? I’d love to know if anything has changed!

An Unexpected Favourite: Whistler, Canada

A quick stop in summer-time Whistler

Before we went on our most recent trip to Canada, many people told us that Whistler wasn’t as popular or beautiful as Banff and therefore we probably shouldn’t spend as long there, if we visited it at all. Seeing as we haven’t been before, we decided to build in a day’s stay at the little ski resort on our way through to our next big stop.

The journey from Vancouver was stunning, at every curve of the road there was something to see. Deep blue lakes with imposing mountings rising upwards to transform into snow-dusted peaks. If this was scenery that people thought we could miss, then they were missing the point!

Arriving at Whistler was a really nice surprise – the little complex is really well built, hiding amongst the scenery without impacting on the surrounding landscape. We were staying at Pan Pacific Whistler Mountain which was absolutely stunning – all wooden panelling and log fires!

The immediate area around the hotel was paved to create a meandering, circular complex, full of restaurants and shops. Although it was quite commercial (it’s going to be, the whole place is designed as a ski resort), it managed to be so well designed that you almost didn’t mind. A stream cut through the centre of the stone walkway, which broke up the run of shops and ensured that the natural draw of the mountain wasn’t forgotten.

We went in the summer, so there was no skiing on the mountain, however, that didn’t mean that it was quiet. In fact, the place was bustling, with biking and dirt trails replacing the snow and ski boots.

As we were only there for a short stay (just the one night), we went in search of a short trundle to see what Whistler had to offer. It was quite late in the afternoon and so we chose to head off down towards Lost Lake, a stunning lake in the middle of Lost Lake Park and only a short walk from the hotel.

Within minutes of leaving the village complex, the trees closed in, hugging the edge of the woodland trail. It was a beautiful walk, initially requiring us to cross over a roaring stream which was captivating to watch. We made sure to create noise and check our surroundings frequently as we were the only ones on the path and we didn’t want to unintentionally creep up on an unsuspecting bear! Being bitten alive by all of the mosquitoes helped to keep us shouting!

The lake itself was beautiful. The surrounding mountains created an imposing backdrop to the calm waters. What we hadn’t expected was the beach and grassy areas surrounding the lake. As it was summer, there were people playing ball games and chilling out on the sand. Its easy to imagine a very different picture in the winter when the lake freezes over and the beach is covered in snow! It would be nice to see it in winter to compare our experiences.

Leaving Vancouver, the people we shared our route with told us to expect places to get more commercial and expensive, the closer we got to Whistler, Jasper and Banff. This felt like almost counter-intuitive advice, given that we were heading away from the big cities and towards mountains and national parks. It did hold to be true, however, which was somewhat disappointing – we like our mountains and lakes to stay rural, not to be encompassed by a shopping street! That being said, Whistler integrated the shopping areas and natural beauty well. The design of the village was well thought out to ensure that the sight of the mountains towering across the skyline wasn’t lost.

Although we loved Whistler, it was still easily one of the most expensive places that we stayed on our trip. This was partly because we’d left it fairly late to book accommodation, but also because Whistler is a fairly expensive place generally. Obviously, if you are heading there in the winter to ski, some of the cost is unavoidable. If you aren’t bothered about skiing, consider visiting in the summer instead. Although it’s not classed as ‘off peak’, there are some better deals on hotels and with a great number of trails to explore, there are lots of cheap (or free!) things to do!

Did you find Whistler expensive or cheap? What are your tips for easing the costs when staying at this location? Tell us in the comments.